
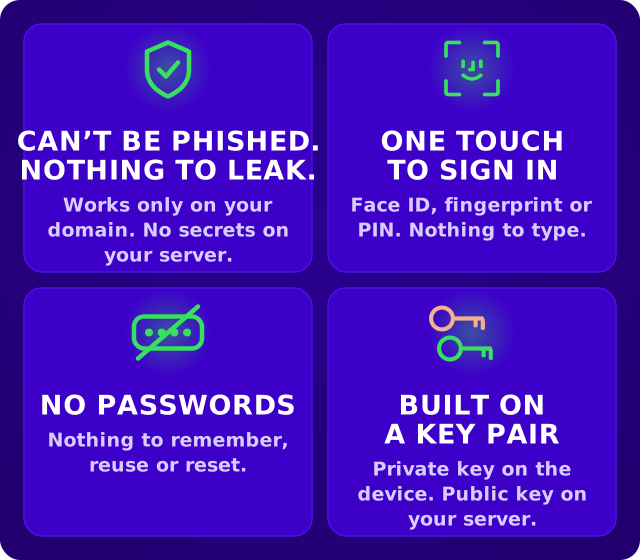
Passkeys give your users one-touch sign-in that cannot be phished and leave nothing in your database worth stealing. This guide gets passkey sign-up and sign-in running in your app, with code you can copy and the decisions to settle before your first user enrols.
How passkeys work
A passkey is a key pair: two keys made together, where the private key can sign data and the public key can only check that signature. When a user creates a passkey, their device makes the pair, locks the private key behind Face ID, a fingerprint or a PIN, and sends only the public key to your server. When they sign in, your server sends a random challenge, the device signs it, and your server checks the signature with the public key it saved.
The private key never reaches your server. At most it syncs, end-to-end encrypted, between the user's own devices through a credential manager such as iCloud Keychain or Google Password Manager. Every exchange goes through the browser, which exposes the standard behind passkeys: the Web Authentication API, or WebAuthn.
That design is where the benefits come from:
- Nothing to steal. Your database holds public keys, which can check a signature but can't make one.
- Nothing to phish. The browser only offers a passkey on the domain it was created for, so a lookalike login page gets nothing to relay.
- No reuse. Every site gets its own key pair.
- Verification built in. The device checks the user's face, fingerprint or PIN before it signs, so one passkey does the work of a password and a second factor.
- Faster for users. One touch instead of a password and a code.
Figure 1 puts passkeys next to the sign-in methods your app probably has today.
| Password | Password + one-time code | Magic link | Passkey | |
|---|---|---|---|---|
| If your database leaks | Hashes can be cracked offline | Hashes can be cracked, and app-code secrets leak with them | Nothing long-lived to steal | Only public keys, which cannot sign anyone in |
| On a convincing fake login page | The user types it in | The fake site relays the code while it is valid | Nothing to type there, but only as safe as the user's inbox | The browser offers nothing: wrong domain |
| Reused on other sites | Often | The password, often | No | Never: one key pair per site |
| What the user does | Remember it and type it | Type it, then wait for a code | Switch to their inbox | Face ID, fingerprint or PIN |
Figure 1How common sign-in methods hold up against the two attacks behind most account takeovers: a leaked database and a fake login page. Only the passkey holds up on every row without leaning on another account.
What passkeys don't change is the rest of your login. If users can still sign in with a password and an SMS code, an attacker will simply phish that route instead, so the fallback you keep matters as much as the passkey code.
Let users add a passkey
Creating a passkey is called registration, and it runs once per device. Figure 2 shows its eight steps, and the code in this section follows the same numbers.

- The user clicks "Create a passkey".
- The browser asks your server for registration options.
- Your server sends them, with a fresh challenge: a random value it keeps on the server and expects to see answered in step 8.
- The device asks for Face ID, a fingerprint or a PIN. The operating system shows this prompt; you don't build it.
- The user approves.
- The device makes a key pair. The private key stays on the device, where none of your code ever sees it.
- The browser sends the public key and a credential ID to your server.
- Your server checks the response against its challenge and stores the public key against the user.
Where users create a passkey
Before the code, decide where the "Create a passkey" button lives. There are three standard places, shown in Figure 3, and most products end up offering all three.

- At sign-up. Users don't need an account before they can have a passkey. Collect an email, create the user record as pending, and run registration straight away, so the passkey is the account's first credential. Activate the account once the passkey is verified, and verify the email soon after, because it is the user's way back in if they ever lose the passkey.
- Right after sign-in. The user has just proved who they are, so it's the natural moment to offer one, with a short "Sign in faster next time" and a clear "Not now".
- In account settings. One card per passkey, showing which provider holds it and when it was created and last used, with options to rename or remove it and a button to add another.
Say "passkey" everywhere rather than "biometric login", because the key may live in a password manager and be unlocked with a PIN. The FIDO Alliance design guidelines show all three patterns with real screens.
Implement the registration flow
Whichever button the user clicks, the same flow runs behind it. The examples use SimpleWebAuthn, a maintained TypeScript library, because the browser's responses arrive as binary structures and decoding them by hand is where most passkey bugs are born. Figure 4 is the options endpoint, steps 2 and 3.
// POST /api/passkeys/register/options   (@simplewebauthn/server 14.x, Node 20+)
import { generateRegistrationOptions } from '@simplewebauthn/server';
import { isoUint8Array } from '@simplewebauthn/server/helpers';
import { rpName, rpID } from './webauthn-config';

const options = await generateRegistrationOptions({
  rpName,
  rpID,
  // The label users see in the passkey picker.
  userName: user.email,
  // The user handle: opaque, stable, never personal data.
  userID: isoUint8Array.fromUTF8String(user.webauthnId),
  excludeCredentials: user.passkeys.map((passkey) => ({
    id: passkey.id,
    transports: passkey.transports
  })),
  authenticatorSelection: {
    residentKey: 'required',
    userVerification: 'required'
  }
});

// Server-side and single use.
await saveChallenge(session.id, options.challenge);
return Response.json(options);
Figure 4The registration options endpoint. It returns a fresh challenge and keeps it on the server; most settings keep the library's defaults, including asking for no attestation.
The settings that change behaviour:
residentKey: 'required'makes the passkey discoverable, so users can sign in without typing a username.userVerification: 'required'makes the face, fingerprint or PIN check mandatory.excludeCredentialsstops a device that already has a passkey from creating a duplicate.userNameis only the label in the passkey picker.userIDis an opaque handle stored on the device, so never put an email in it.rpIDis the domain your passkeys belong to. It can never change, so it gets its own section below.
In the browser, steps 1 to 7 fit in one small component. Figure 5 is a React button, and the same shape works in any framework.
'use client';
import { startRegistration } from '@simplewebauthn/browser';

export function AddPasskeyButton() {
  async function addPasskey() {
    const opts = await fetch('/api/passkeys/register/options', { method: 'POST' });
    if (!opts.ok) throw new Error('Could not load passkey options');
    const optionsJSON = await opts.json();

    let response;
    try {
      response = await startRegistration({ optionsJSON });
    } catch (err) {
      // The user closed the prompt: leave the page as it was.
      if (err instanceof Error && err.name === 'NotAllowedError') return;
      throw err;
    }

    const res = await fetch('/api/passkeys/register/verify', {
      method: 'POST',
      headers: { 'content-type': 'application/json' },
      body: JSON.stringify(response)
    });
    if (!res.ok) throw new Error('Passkey registration failed');
  }

  return <button onClick={addPasskey}>Add a passkey</button>;
}
Figure 5The browser side of registration in React. It fetches options, lets the device create the passkey, and posts the result back; the challenge and every check stay on the server.
In Next.js, keep the WebAuthn calls in a client component, inside an event handler, never in a server component or server action, and make each endpoint a route.ts that exports POST. Keep the challenge on the server, in an HTTP-only session or a short-lived database row: a challenge held in client state is one the client can swap.
Step 8 is the verify endpoint in Figure 6.
// POST /api/passkeys/register/verify
import { verifyRegistrationResponse } from '@simplewebauthn/server';

let result;
try {
  result = await verifyRegistrationResponse({
    response, // the browser's attestation, as JSON
    // Read and delete in one step, so the challenge is single use.
    expectedChallenge: await takeChallenge(session.id),
    expectedOrigin: 'https://app.example.com',
    expectedRPID: 'example.com'
    // requireUserVerification defaults to true
  });
} catch {
  // Any failed check throws: wrong challenge, origin, RP ID or no UV.
  return Response.json({ verified: false }, { status: 400 });
}

const { verified, registrationInfo } = result;
if (!verified || !registrationInfo) {
  return Response.json({ verified: false }, { status: 400 });
}

const { credential, aaguid, credentialDeviceType, credentialBackedUp } =
  registrationInfo;

await storePasskey({
  userId: user.id,
  id: credential.id,                  // base64url: your lookup key
  publicKey: credential.publicKey,    // raw bytes: store them once, as bytes
  counter: credential.counter,        // often 0, and that is fine
  transports: credential.transports,  // better sign-in hints later
  aaguid,                             // names the passkey provider
  deviceType: credentialDeviceType,   // 'singleDevice' or 'multiDevice'
  backedUp: credentialBackedUp        // synced right now?
});
Figure 6The registration verify endpoint. The library throws if any check fails, the challenge is deleted as it is read, and everything worth storing arrives on registrationInfo.
One library call runs every check: your challenge, your origin, your domain and the user-verified flag. Of the stored columns, sign-in needs the first four. The AAGUID names the provider, such as iCloud Keychain, through the community passkey AAGUID list, and deviceType and backedUp tell you whether a lost phone means a lost passkey. Store the public key as bytes, once: when a signature won't verify, the cause is far more often bytes encoded twice than anything cryptographic.
Sign users in with their passkey
Sign-in has the same shape as registration. Figure 7 shows its eight steps.

- The user clicks "Sign in with a passkey", or picks a passkey from the username field's autofill, covered below.
- The browser asks your server for sign-in options.
- Your server sends a fresh challenge and keeps it on the server.
- The device asks for Face ID, a fingerprint or a PIN.
- The user approves.
- The device signs the challenge with the private key.
- The browser sends the signature and the credential ID to your server.
- Your server checks the signature with the stored public key and signs the user in.
Implement the sign-in flow
Figure 8 is the options endpoint, steps 2 and 3. It leaves out allowCredentials, so the browser offers every passkey it holds for your domain and the user never types a username. That also avoids a quiet leak: an endpoint that returns the credential IDs for a typed username tells anyone which accounts exist.
// POST /api/passkeys/login/options
import { generateAuthenticationOptions } from '@simplewebauthn/server';
import { rpID } from './webauthn-config';

const options = await generateAuthenticationOptions({
  rpID,
  userVerification: 'required'
  // No allowCredentials: the browser offers every passkey for this rpID,
  // and the user never types a name.
});

await saveChallenge(session.id, options.challenge);
return Response.json(options);
Figure 8The sign-in options endpoint. Without allowCredentials, the user signs in without typing a username, and the endpoint reveals nothing about which accounts exist.
In the browser, the button from Figure 5 works as it is, with startAuthentication in place of startRegistration and the sign-in endpoints in place of the registration ones. Step 8 is the verify endpoint in Figure 9. Because the user never typed a name, your server learns who they are from the response, so it must also check that the user handle in the response belongs to the passkey's owner.
// POST /api/passkeys/login/verify
import { verifyAuthenticationResponse } from '@simplewebauthn/server';
import { isoBase64URL } from '@simplewebauthn/server/helpers';

// Consume the challenge first, whatever happens next.
const expectedChallenge = await takeChallenge(session.id);

const stored = await findPasskeyById(response.id);
if (!stored) {
  return Response.json({ unknownCredential: true }, { status: 404 });
}

// Username-free sign-in: the user handle must name this credential's owner.
const owner = await findUserById(stored.userId);
const handle = isoBase64URL.toUTF8String(response.response.userHandle ?? '');
if (handle !== owner.webauthnId) {
  return Response.json({ verified: false }, { status: 400 });
}

let result;
try {
  result = await verifyAuthenticationResponse({
    response,
    expectedChallenge,
    expectedOrigin: 'https://app.example.com',
    expectedRPID: 'example.com',
    credential: {
      id: stored.id,
      publicKey: stored.publicKey,
      counter: stored.counter,
      transports: stored.transports
    }
  });
} catch {
  // Throws on any failed check, including a non-zero counter that failed to advance.
  return Response.json({ verified: false }, { status: 400 });
}

const { verified, authenticationInfo } = result;
if (!verified) return Response.json({ verified: false }, { status: 400 });

// Save the new counter and the current backup state.
await updatePasskey(stored.id, {
  counter: authenticationInfo.newCounter,
  backedUp: authenticationInfo.credentialBackedUp
});

await openSession(stored.userId);
Figure 9The sign-in verify endpoint. The challenge is deleted first, the user handle is matched to the passkey's owner, and the new counter and backup state are saved once the check passes.
Two details trip up almost every team:
- Don't reject a counter that stays at zero. Synced passkeys report a signature counter of 0 on every sign-in, because the same key lives on several devices. SimpleWebAuthn only rejects a counter that fails to advance when one of the values is non-zero. If you verify some other way, copy that rule, or you lock out most of your users.
- Handle deleted passkeys. When a user removes a passkey in your settings, their phone keeps offering it. Return the unknown-credential case separately, as Figure 9 does, and use SimpleWebAuthn's
sendSignalto tell the user's credential manager the passkey is gone, where the browser supports it.
After that, start a session as you would after any other login. (If you use tokens, how JWT authentication works covers the rest.)
What the signature proves
Figure 10 shows what the device actually signs, and why a fake login page can't use a passkey.

- The browser adds your challenge and the page's real origin, such as
https://app.example.com. - The device adds your domain and a user-verified flag, which says the user passed Face ID, a fingerprint or a PIN rather than just tapping.
- The private key signs all four at once, so nobody can change any of them without breaking the signature.
That is why every verify call names expectedOrigin and expectedRPID: a response made on a lookalike site carries that site's origin and fails the check. A password or a one-time code can't tell which site it was typed into. A passkey can.
Offer passkeys right in the username field
The smoothest sign-in needs no button: the user clicks into the username field, picks their passkey from the autofill list, and is signed in. This is called conditional UI, and it relies on the discoverable passkeys from Figure 4. Figure 11 shows how its timing differs from a normal sign-in.

That timing causes two problems:
- The challenge must outlive the wait. If it expires after a minute and the user comes back to the tab after two, sign-in fails for no visible reason. Give these challenges a longer life, or fetch fresh options when the tab regains focus.
- You still need a visible button, because autofill is invisible to anyone who doesn't know to look for it. Only one passkey request can run at a time, so the button has to cancel the waiting one. SimpleWebAuthn does that for you when you start a new request.
Wiring it up takes one attribute on the input and one call, shown in Figure 12.
<input name="username" autocomplete="username webauthn" />import {
startAuthentication,
browserSupportsWebAuthnAutofill
} from '@simplewebauthn/browser';
if (await browserSupportsWebAuthnAutofill()) {
const res = await fetch('/api/passkeys/login/options', { method: 'POST' });
if (!res.ok) throw new Error('Could not load passkey options');
const optionsJSON = await res.json();
try {
// Pending, with no UI, until the user picks a passkey from autofill.
const response = await startAuthentication({
optionsJSON,
useBrowserAutofill: true
});
const verify = await fetch('/api/passkeys/login/verify', {
method: 'POST',
headers: { 'content-type': 'application/json' },
body: JSON.stringify(response)
});
if (!verify.ok) throw new Error('Passkey sign-in failed');
window.location.assign('/');
} catch (err) {
// The passkey button cancels this request when it starts its own.
if (err instanceof Error && err.name === 'AbortError') return;
throw err;
}
}Figure 12Autofill sign-in with SimpleWebAuthn. The webauthn token in autocomplete puts passkeys in the field's suggestions, and useBrowserAutofill: true makes the request wait silently until the user picks one.
Decisions to make before you launch
The code is the easy part. These are the decisions teams most often get wrong, and some of them can't be undone once users have enrolled.
Which domain your passkeys belong to
Every passkey is tied to one domain, its relying-party ID (RP ID): the rpID in Figure 4. It is baked into the passkey when it is created, and the browser only offers the passkey on that domain and the hosts under it. Change it later and every existing passkey quietly disappears from your users' pickers. Figure 13 shows the options for a page on app.example.com.

- Pick the apex domain,
example.com, in most cases. The same passkey then works onapp.example.com,www.example.comand anything you launch later. An RP ID only reaches downwards, soapp.example.comnever coversexample.com. - Set it per environment, in config, not from the request's
Hostheader. Passkeys created on staging don't exist in production, and you want that to be a decision, not a surprise. - Watch preview deployments. A preview on your host's domain, such as
my-app-git-branch.vercel.app, is a different domain, so its passkeys never work in production. A preview on a subdomain of your real domain can create passkeys that production accepts, so keep its origin out of production's expected origins. - Separate domains need related origins. For
example.comandexample.de, publish the allowed origins athttps://<your-rp-id>/.well-known/webauthn. Browsers only have to accept five names in that list and support arrived late, so check the passkeys.dev device-support matrix first.
Get it wrong and the browser throws a SecurityError before any prompt appears, nearly always because of an RP ID copied from another environment. The rules come from W3C Web Authentication Level 3, a W3C Recommendation since 25 August 2026.
Plan for users with several passkeys
Whether a passkey is available is a fact about the device in front of the user, not about the user.
- Passkeys sync within one provider. A passkey in iCloud Keychain follows the user's Apple devices, and one in Google Password Manager follows their Google account. Plan as if every ecosystem holds its own passkey.
- A phone can sign in on a laptop. The browser shows a QR code, the user scans it with their phone, and the two confirm over Bluetooth that they are close. A line near your button saying "a passkey on your phone works here too" saves abandoned sign-ins.
- Store one user to many passkeys. Users collect one per ecosystem. List them in settings with the provider's name, from the AAGUID, and let users rename and remove them. When they remove one, send the Signal API update from the sign-in section.
Support differs by platform and version, so trust the passkeys.dev device-support matrix over any table in an article, this one included.
Give users a way in when their passkey isn't there
"No passkey here" covers two different situations, and Figure 14 separates them.

- Fallback: the passkey is on another device. Keep a second sign-in method switched on and visible. An emailed magic link is the most forgiving, and Google sign-in works well when your users reliably have the account. End every fallback sign-in by offering a passkey on the device the user is holding.
- Recovery: every device is gone. There is no emailing someone their passkey, so decide before anyone enrols how users prove who they are. From strongest to weakest: recovery codes saved at enrolment, a verified email or phone route with a delay and an alert on every other channel, or an admin in the same organisation re-inviting them.
- Prevention beats both. Soon after a user adds their first passkey, prompt them to add a second in a different ecosystem or on a security key.
The fallback also sets your security floor: a passkey next to an SMS code is exactly as strong as the SMS code, because attackers pick the weakest method you accept.
Roll passkeys out next to your current login
Launch passkeys as an extra option, never as a replacement on day one. Figure 15 shows four stages, each with the number that tells you it is working.

- Enrol in account settings, where the user is already signed in and a failure costs nothing. Watch how many passkeys are created.
- Add passkeys to the sign-in form, as a button plus autofill. Watch the success rate by platform: failures bunched on one operating system version point to a bug.
- Offer one right after sign-in. This is where adoption comes from. Chrome 136 and Safari 18 can create a passkey without a prompt straight after a password sign-in, which is
useAutoRegister: truein SimpleWebAuthn. Elsewhere, show a prompt the user can dismiss, and track how often they do. - Make passkeys the default for new accounts once enrolment and recovery have proven themselves. Watch the share of users with two or more passkeys.
Keep every other sign-in method on throughout.
Decide how much to build yourself
The decisions above stay with you however you build. The machinery doesn't have to, as Figure 16 shows.
| Raw WebAuthn | Server library | Managed passkey API | |
|---|---|---|---|
| Parse and verify the binary responses | You | The library | The provider |
| Issue and hold the challenge | You | You | The provider |
| Store and look up credentials | You | You | The provider |
| Track browser and platform changes | You | The library, partly | The provider |
| Choose the RP ID | You | You | You, by where login runs |
| Design fallback and recovery | You | You | You, from the provider's options |
Figure 16Three ways to implement passkeys. Moving right, the first four rows come off your plate; the last two never do.
This guide used a maintained server library, which is what most production apps run on. A managed passkey API also runs the server side and stores the credentials, so turning passkeys on becomes a setting.
The Bridge makes passkeys a setting
Everything in this guide is code you own for as long as your app runs: four endpoints, a challenge store, a credential table, recovery emails, and a steady stream of browser changes to keep up with. The Bridge runs all of that for you. Switch passkeys on in the Control Center, or from your terminal:
bridge app update --passkeys-enabled trueOnce they're on, the login form from our SDK shows "Continue with passkey" next to your other sign-in methods. It reads your app's settings as it loads, so there is nothing to redeploy. In a React app with the SDK installed, the whole integration is two components:
import { LoginForm, PasskeySetup } from '@nebulr-group/bridge-react';

// Your sign-in page: passkeys appear here once they're switched on
<LoginForm />

// The page an emailed setup link opens: /auth/setup-passkey/:token
<PasskeySetup token={token} onComplete={() => navigate('/auth/login')} />
Figure 17Passkeys with The Bridge's React components. They take the place of the four server endpoints, the credential table and the browser code a hand-built integration needs. Next.js, SvelteKit and Angular get the same components.
What that covers from this guide:
- Both flows. Challenges, verification and credential storage run on The Bridge's servers.
- Enrolment and recovery. Users add a passkey from a setup link emailed to their verified address, and the same link is how someone who lost their phone gets a new one.
- A fallback. Email and password sign-in is always on, and magic link and Google sign-in switch on next to passkeys, so users without a passkey on this device still get in.
- The domain decision stays yours. Build login from the components and your passkeys belong to your own domain. Use the hosted login page and they belong to ours. Choose before your first user enrols.
More than passkeys
Passkeys are one sign-in method on The Bridge, and sign-in is one part of it. The same integration gives you:
- Every other way to sign in. Email and password, always on, plus magic links, Google, Azure AD single sign-on and multi-factor authentication.
- Users, roles and workspaces. Roles and permissions, and multi-tenant workspaces for B2B apps, where one person can belong to several teams.
- Billing on Stripe. Plans, trials, entitlements and usage quotas per workspace, with checkout and the customer portal handled for you.
- Feature flags. Roll features out by user, role or plan, and change them live from the Control Center without a deploy.
We run passkeys on our own sign-in at thebridge.dev. Prefer to read first? The passkey API shows what The Bridge handles for you, and the passkeys guide in the docs walks through the setup end to end.


