
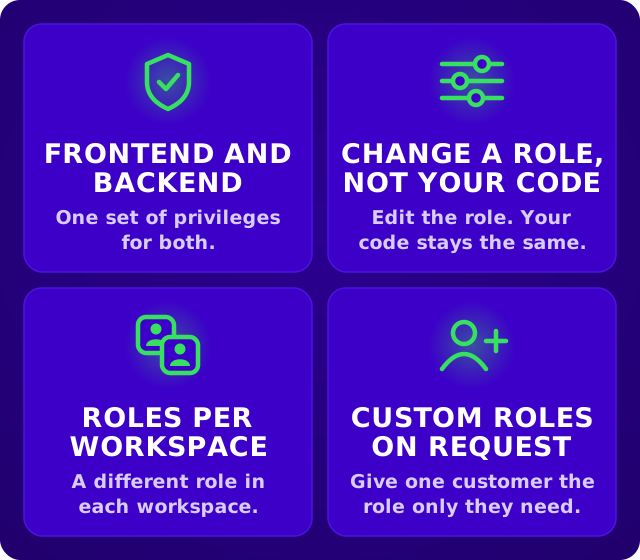
In most applications, users need access to different features and information. An administrator may reach every setting, while a team member works with the core features of the app. The concept that handles what each user is allowed to do is called role-based access control (RBAC), and this guide introduces its concepts, best practices and implementation examples.
How role-based access control works
RBAC gives each user a role, and each role groups the privileges that match the actions its users may take. An Admin role might hold the privileges to use the core features and manage the team, while a Member role holds only those for everyday work. A privilege can be as broad as READ or as narrow as projects:delete; how finely you cut them is up to you.
Those privileges are used in two places, the frontend and the backend, as Figure 1 shows.

How roles and users are connected
Roles and users are connected, because your application has to know which role each user has. In a B2B app a user holds one role in each organisation they belong to, stored in your database with the rest of their account.
To make that role data available to every part of your application, it is usually put in the access token, a signed JSON Web Token (JWT), together with the other user information. That way your frontend, your backend or several microservices all use the same data. Figure 2 shows what such a token holds.
{
  "sub": "user_8f2a",
  "email": "ana@acme.com",
  "workspace": "acme",
  "role": "ADMIN",
  "privileges": ["core:read", "core:write", "team:manage"],
  "exp": 1790612400
}
Figure 2The claims of an access token that carries RBAC data: who the user is, which workspace the token is for, the user's role there and that role's privileges. The token is signed, so the frontend can read it but can't change it.
How RBAC works in the frontend
After sign-in, the frontend reads the user's privileges from the token, or fetches them, and uses them in two ways:
- Routes. Each protected route names the privilege it needs. A user without it is sent somewhere useful instead, such as the start page.
- Features. Buttons, menu items and whole panels render only for users who hold the privilege, so each user sees an app that fits their role.
The frontend shapes what users see. Protecting the data is the backend's job, because a request can reach your API without passing through your UI.
How RBAC works in the backend
The backend checks every request before it runs:
- Find the role. Verify the token and look up the user's role in the workspace the request is for.
- Load its privileges, once per request.
- Compare. Each endpoint, and any business logic that depends on the user's rights, names the privilege it needs. With it the code runs. Without it the endpoint answers 403, or the logic takes another path, such as an export that leaves out billing data for users without
account:manage.
This covers every entry point, not only API routes: server actions, background jobs and exports read and change data too.
Make frontend and backend work together
RBAC runs smoothly when both sides share one model:
- One source of truth. Roles and privileges are stored and assigned on the backend. The frontend receives them and never decides on its own.
- The same names on both sides. The frontend checks
team:manageexactly as the API does, so there's no mapping from roles to screens to keep in sync. - Delivered with the session, in the access token (Figure 2) or from an endpoint such as
/me/privileges. - Kept fresh. When an admin changes a role, the frontend needs the new privileges: refresh the token, fetch them again, or push the change to the open app.
Best practices to make RBAC work in your application
A working RBAC check is quick to write. What decides whether it lasts is the model around it, which is where these practices come in.
Make the role and privilege model flexible
Privileges are the building blocks and roles are bundles of them. Define each privilege once, then cherry-pick privileges into roles, so a new role is a new selection rather than new code.
- Code checks privileges, never role names. A handler that asks for
core:writekeeps working when you add a role or change what one holds. A handler that asks "is this an Admin?" breaks the first time you do. - Choose how finely to cut privileges. Broad privileges such as
core:readandcore:writeare easy to start with. Split an area into finer ones, such asprojects:delete, when a customer needs that control, and keep one naming scheme (area:action) so the list stays readable. - Give each role its full list of privileges rather than having roles inherit from each other. A flat list is easier to read in an audit, and changing one role can't affect another.
Start with four roles
Most B2B apps launch with the same four roles, built from a handful of broad privileges. Figure 3 is a role model you can copy.

- The Owner can do it all, including billing and workspace settings. Every workspace needs at least one, and the last Owner can't be demoted.
- Admins use the core features and manage the team. They invite people and change roles, but can't make anyone an Owner or change an Owner's role.
- Members are the standard users. They read and write in the core features. Make this the default role for new invites.
- Viewers read but don't write. They suit stakeholders, auditors and trial seats.
Plan for enterprise custom roles and privileges
Your first enterprise customer will ask for roles of their own, such as "Billing manager" or "Auditor", sometimes built from privileges your other customers don't use. Plan for it:
- Custom roles are built from the privileges you publish. Your privilege names become a contract with customers, so rename them carefully.
- Built-in roles stay the same everywhere. A customer who wants a different Admin copies it into a custom role, so your defaults mean the same thing in every workspace.
Give users a different role in each organisation
In a B2B app, users belong to organisations (also called workspaces or tenants), and one person can belong to several. A consultant can be an Admin for one customer and a Viewer for another, with one login. That only works if the role is stored on the membership, the link between the user and the organisation, rather than on the user. When the user switches organisation, the app loads that organisation's privileges.
Let admins change roles in a user management UI
Customers' admins should invite people, change roles and remove access from your app, without asking your support team. The endpoint behind that screen hands out every other privilege, so it follows four rules:
- Nobody grants what they don't hold. An Admin can only assign roles whose privileges are all in the Admin's own set.
- Nobody changes someone who outranks them. An Admin can only change the role of someone whose current privileges are all in the Admin's own set, so Admins can't demote Owners.
- Keep at least one Owner. Lock the workspace's Owner memberships (
select ... for update) in the same transaction as the change, or two Owners demoting each other at once can leave the workspace with none. - Log every change: who changed whose role, from what, to what. Enterprise customers ask for this list in their first security review.
Black belt: combine RBAC with feature flags
A feature flag decides who gets a feature. When its rule targets a role or a privilege, you stop hardcoding roles in your code: the frontend and the API both ask for the flag, and the rule decides who gets through, as Figure 4 shows.

- Features are assigned, not coded. Moving a feature from one role to another is a change to the flag rule.
- Frontend and API stay in step. Both ask for the same flag, so a page can't show a feature its API refuses.
- Rollouts come free. The same rule can open a feature to one customer, or to a share of users, before everyone.
The catch is that a feature flag system is a second project to build, with its own rules engine, admin screens and client libraries.
Black belt: create roles without a code release
When code only checks privileges or flags, roles become pure data. A new role, or a change to what a role holds, is then an action in your admin UI rather than a deploy. Getting there takes three pieces: an editor where admins build roles from your privilege list, validation so nobody builds a role with privileges they don't hold, and the audit log from the user management rules above.
Black belt: make changes take effect immediately
Users notice RBAC most when it lags: a promoted user who still can't open the settings page, or a removed user who still can. Make every change reach the open app straight away:
- Push the change. Keep a realtime connection from the app to your backend, and send an update when the user's role, a role's privileges or a flag rule changes.
- Refresh the session when the update arrives, so the frontend and the API both see the new privileges.
- Short-lived tokens as the fallback. If a push is missed, a token that expires in minutes caps how long old privileges can live.
Other approaches: when RBAC isn't enough
RBAC answers "what may this kind of user do here?". Two other models answer different questions:
- ABAC (attribute-based access control) decides by rules over attributes of the user, the resource and the request. It fits when access depends on the data itself, such as region, department or time of day.
- ReBAC (relationship-based access control) decides by relationships between users and single objects, as in Google's Zanzibar. It fits when users share individual documents with each other, as in Google Docs.
Most SaaS apps need RBAC plus a few ownership checks long before they need either of the others. If "only the author can edit a draft" is your only exception, keep it as a check in the handler.
Role-based access control implementation in a backend
The code in this section is the core of an RBAC backend, not a complete system. It shows the schema, the check and the guards; user management screens, a role editor, audit logs and live updates come on top. Figure 5 is the check it implements.

- A request arrives with the signed-in user and the workspace they are working in.
- The backend finds the user's membership in that workspace. The role is stored there, not on the user.
- It loads that role's privileges, once per request.
- The handler names the privilege the action needs. Creating a project needs
core:write. - The backend allows the request, or answers 403.
Store the role on the membership
Figure 6 shows the five tables, with the role on the membership row. If you're still deciding how users and workspaces relate, our multi-tenant setup guide covers that side.

The SQL is short. It is written for Postgres, and any relational database works the same way.
create table users (
  id    text primary key,
  email text not null unique
);

create table workspaces (
  id   text primary key,
  name text not null
);

-- Built-in roles have no workspace_id; a workspace's custom roles have one.
create table roles (
  id           text primary key,
  workspace_id text references workspaces(id),
  key          text not null,
  name         text not null,
  unique (workspace_id, key)
);

create table role_privileges (
  role_id   text not null references roles(id) on delete cascade,
  privilege text not null,  -- 'core:write'
  primary key (role_id, privilege)
);

-- The role lives here: one role per user per workspace.
create table memberships (
  user_id      text not null references users(id),
  workspace_id text not null references workspaces(id),
  role_id      text not null references roles(id),
  primary key (user_id, workspace_id)
);
Figure 7The RBAC schema in SQL. The primary key on memberships allows one role per user per workspace, and role_privileges stores privileges as plain strings.
One rule the schema can't enforce on its own: a membership's role must be built-in or belong to the same workspace. Check it in the code that assigns roles, or one customer's custom role can end up in another customer's workspace.
Load privileges once per request in RBAC middleware
The check should be cheap, so load the user's privileges once, when the request enters a workspace, and keep them on the request. Figure 8 does that as Express 5 middleware with the pg client; Express 5 passes a failed query on to your error handler.
import type { Request, Response, NextFunction } from 'express';
import { pool } from './db';

declare global {
  namespace Express {
    interface Request {
      userId?: string; // set by your authentication middleware
      privileges?: Set<string>;
    }
  }
}

// Mounted on /workspaces/:workspaceId, after authentication.
export async function loadPrivileges(req: Request, res: Response, next: NextFunction) {
  const { rows } = await pool.query<{ privilege: string | null }>(
    `select rp.privilege
       from memberships m
       left join role_privileges rp on rp.role_id = m.role_id
      where m.user_id = $1 and m.workspace_id = $2`,
    [req.userId, req.params.workspaceId],
  );
  // Not a member: answer as if the workspace doesn't exist.
  if (rows.length === 0) return res.status(404).end();
  req.privileges = new Set(rows.flatMap((r) => (r.privilege ? [r.privilege] : [])));
  next();
}

export function requirePrivilege(privilege: string) {
  return (req: Request, res: Response, next: NextFunction) => {
    if (req.privileges?.has(privilege)) return next();
    res.status(403).json({ error: `Missing privilege: ${privilege}` });
  };
}
Figure 8RBAC middleware that loads a user's privileges for one workspace, and a guard that checks one of them. Someone who isn't a member gets a 404, so the response doesn't confirm the workspace exists.
Guard every entry point
Each route then names the one privilege it needs, as in Figure 9. The route reads as its own access rule, and nothing in it mentions a role.
import express from 'express';
import { loadPrivileges, requirePrivilege } from './rbac';

const workspace = express.Router({ mergeParams: true });

workspace.get('/projects', requirePrivilege('core:read'), listProjects);
workspace.post('/projects', requirePrivilege('core:write'), createProject);
workspace.post('/members', requirePrivilege('team:manage'), inviteMember);

// What the frontend may show: the same set the backend enforces.
workspace.get('/me/privileges', (req, res) => res.json([...req.privileges!]));

app.use('/workspaces/:workspaceId', authenticate, loadPrivileges, workspace);
Figure 9Routes guarded by privilege. Ana, an Admin in Acme and a Viewer in Globex, can create projects in Acme and gets a 403 for the same request in Globex.
API routes are the obvious entry point. These are the ones that get missed:
- Server actions and form handlers. In Next.js a server action is a public endpoint, so it runs the same check before it writes anything.
- Background jobs. Check when the job is queued, with the user who asked, and store who that was. The worker runs later with no request to check.
- Exports, webhooks and admin scripts. Anything that reads workspace data is an entry point, even when no button leads to it.
Aim to deny by default, as the OWASP authorization cheat sheet recommends. With a guard on each route, the practical version is a test that lists every route and fails if one has no requirePrivilege. Routes every member may call, like /me/privileges, go on an explicit allow-list.
Implementing RBAC in a frontend
Like the backend section, this is the core of the frontend side, not a complete system: it loads the privileges once and uses them to guard routes and features. Figure 10 loads them in React.
import { createContext, useContext, useEffect, useState, type ReactNode } from 'react';

const PrivilegesContext = createContext<ReadonlySet<string> | null>(null);

// Loads the signed-in user's privileges for the current workspace, once.
export function PrivilegesProvider({ workspaceId, children }: { workspaceId: string; children: ReactNode }) {
  const [privileges, setPrivileges] = useState<ReadonlySet<string> | null>(null);

  useEffect(() => {
    fetch(`/workspaces/${workspaceId}/me/privileges`)
      .then((res) => res.json())
      .then((list: string[]) => setPrivileges(new Set(list)));
  }, [workspaceId]);

  return <PrivilegesContext.Provider value={privileges}>{children}</PrivilegesContext.Provider>;
}

// true or false, or null while the privileges are still loading.
export function usePrivilege(privilege: string): boolean | null {
  const privileges = useContext(PrivilegesContext);
  return privileges ? privileges.has(privilege) : null;
}
Figure 10A React provider that loads the user's privileges for the current workspace from the backend, and a hook that answers whether the user holds one. Switching workspace loads that workspace's privileges.
With the hook in place, guarding a route and a feature takes two small components, shown in Figure 11 with React Router.
import type { ReactNode } from 'react';
import { Navigate, Route, Routes } from 'react-router-dom';
import { usePrivilege } from './privileges';

// Routes: users without the privilege go back to the start page.
export function RequirePrivilege({ privilege, children }: { privilege: string; children: ReactNode }) {
  const allowed = usePrivilege(privilege);
  if (allowed === null) return null; // still loading
  return allowed ? <>{children}</> : <Navigate to="/" replace />;
}

// Features: render only for users who hold the privilege.
export function Can({ privilege, children }: { privilege: string; children: ReactNode }) {
  return usePrivilege(privilege) ? <>{children}</> : null;
}

export function AppRoutes() {
  return (
    <Routes>
      <Route path="/" element={<Dashboard />} />
      <Route
        path="/settings/billing"
        element={
          <RequirePrivilege privilege="account:manage">
            <Billing />
          </RequirePrivilege>
        }
      />
    </Routes>
  );
}

export function TeamToolbar() {
  return (
    <Can privilege="team:manage">
      <InviteButton />
    </Can>
  );
}
Figure 11A route guard and a feature guard in React. An Admin who opens /settings/billing lands on the start page, and the Invite people button renders only for users who may manage the team.
Two things to add as the app grows: fetch the privileges again when a role changes (or receive the change over a realtime connection), and swap the null loading state for your app's own loading screen.
The Bridge gives you RBAC ready-made
Building and maintaining an RBAC system with the best practices above takes time. Getting the most out of it also means combining it with a feature flag system, which is another implementation of its own.
The Bridge gives you a ready-made RBAC system. You define your own roles and privileges, and use them directly in your app's frontend and backend. Because it also comes with feature flags, you never need to hardcode roles or privileges in your code: assign them to features instead. When you move a feature to another role, or create a new role that should get a set of features, you do it in the Control Center or from the CLI, without releasing code.
What you get:
- Roles and privileges you define, with one role per user per workspace and a drop-in team panel where your customers' admins invite people and change roles.
- Feature flags that target roles and privileges, checked the same way in the frontend and the backend.
- Live updates. When an admin changes a user's role, the user's open app updates without a refresh.
- Custom roles for one customer, built from their own privileges when an enterprise deal needs it.
It sits on the same platform as sign-in, multi-tenant workspaces and billing on Stripe, so roles, plans and features describe the same users.
Prefer to read first? How roles and privileges work in the docs walks through the model, and common role setups has worked examples.


